Monday, 24 May 2021

Campaign Game - Taking the Gembloux Gap turn 1-2 - Chain of Command

My friend Steffen and I started the Chain of Command pint-size campaign 'Taking the Gembloux Gap' the other day. We had a full day to play so managed to get through 4 turns of play.


I was the Germans attacking Steffen's French forces in this early war campaign. It is a straight forward 10 turn campaign with 6 tables to get through if the Germans are to win. The Germans have 3 platoons to complete the campaign with. However, once I change platoon the previous platoon is out of the campaign. The French have 3 platoons as well, but they are fixed to certain scenarios. So one platoon to fight the first scenario. A second platoon to fight the 2-4 scenarios, and a third platoon to fight scenarios 5 and 6.

Turn 1.

First scenario, Palm-off at Perbais, is a straight attacker-defender scenario, where the objective for both sides is to break the enemy's force morale or make them retreat.

I had chosen a Stuka Bombardment as one of my support choices, which happens before the patrol phase. The attack destroyed one building and set two other buildings on fire and made them unstable. Hopefully the smoke from the fire would aide me in my advance.


The patrol went okay for the Germans. As the center line of advance would be through very open space, the Germans tried to ensure jump-off points on both flanks. This went rather well, as they got two points on each flank about a quarter up the field. The French ended up with 2 points on their left flank and one in the center, and since they had a lot of defensive terrain on their side of the field, that suited them perfectly.

As it happened I rolled three 6's in my first phase, so the first turn ended very quickly. One of the unstable buildings collapsed but the fire continued in both buildings, so that was lucky for me. We ruled that the effect of the Stuka Bombardment that affects the French units who wants to deploy (4+ to deploy, will deploy with d6 shock on each teams) would still be in play, as it doesn't specify that it ends with the end of a turn. So the first French forces did enter the table, but with shock already in play.

The Germans started with a squad on their right flank, but it quickly came under heavy fire from a French squad and a MMG team. Despite their initial shock the French managed to pin the Germans quite effectively.


So the Germans tried to advance on their left flank instead. 2 squads was sent forward to take the French positions. But the French were quick to reinforce this position, and the first German squad took heavy casualties.

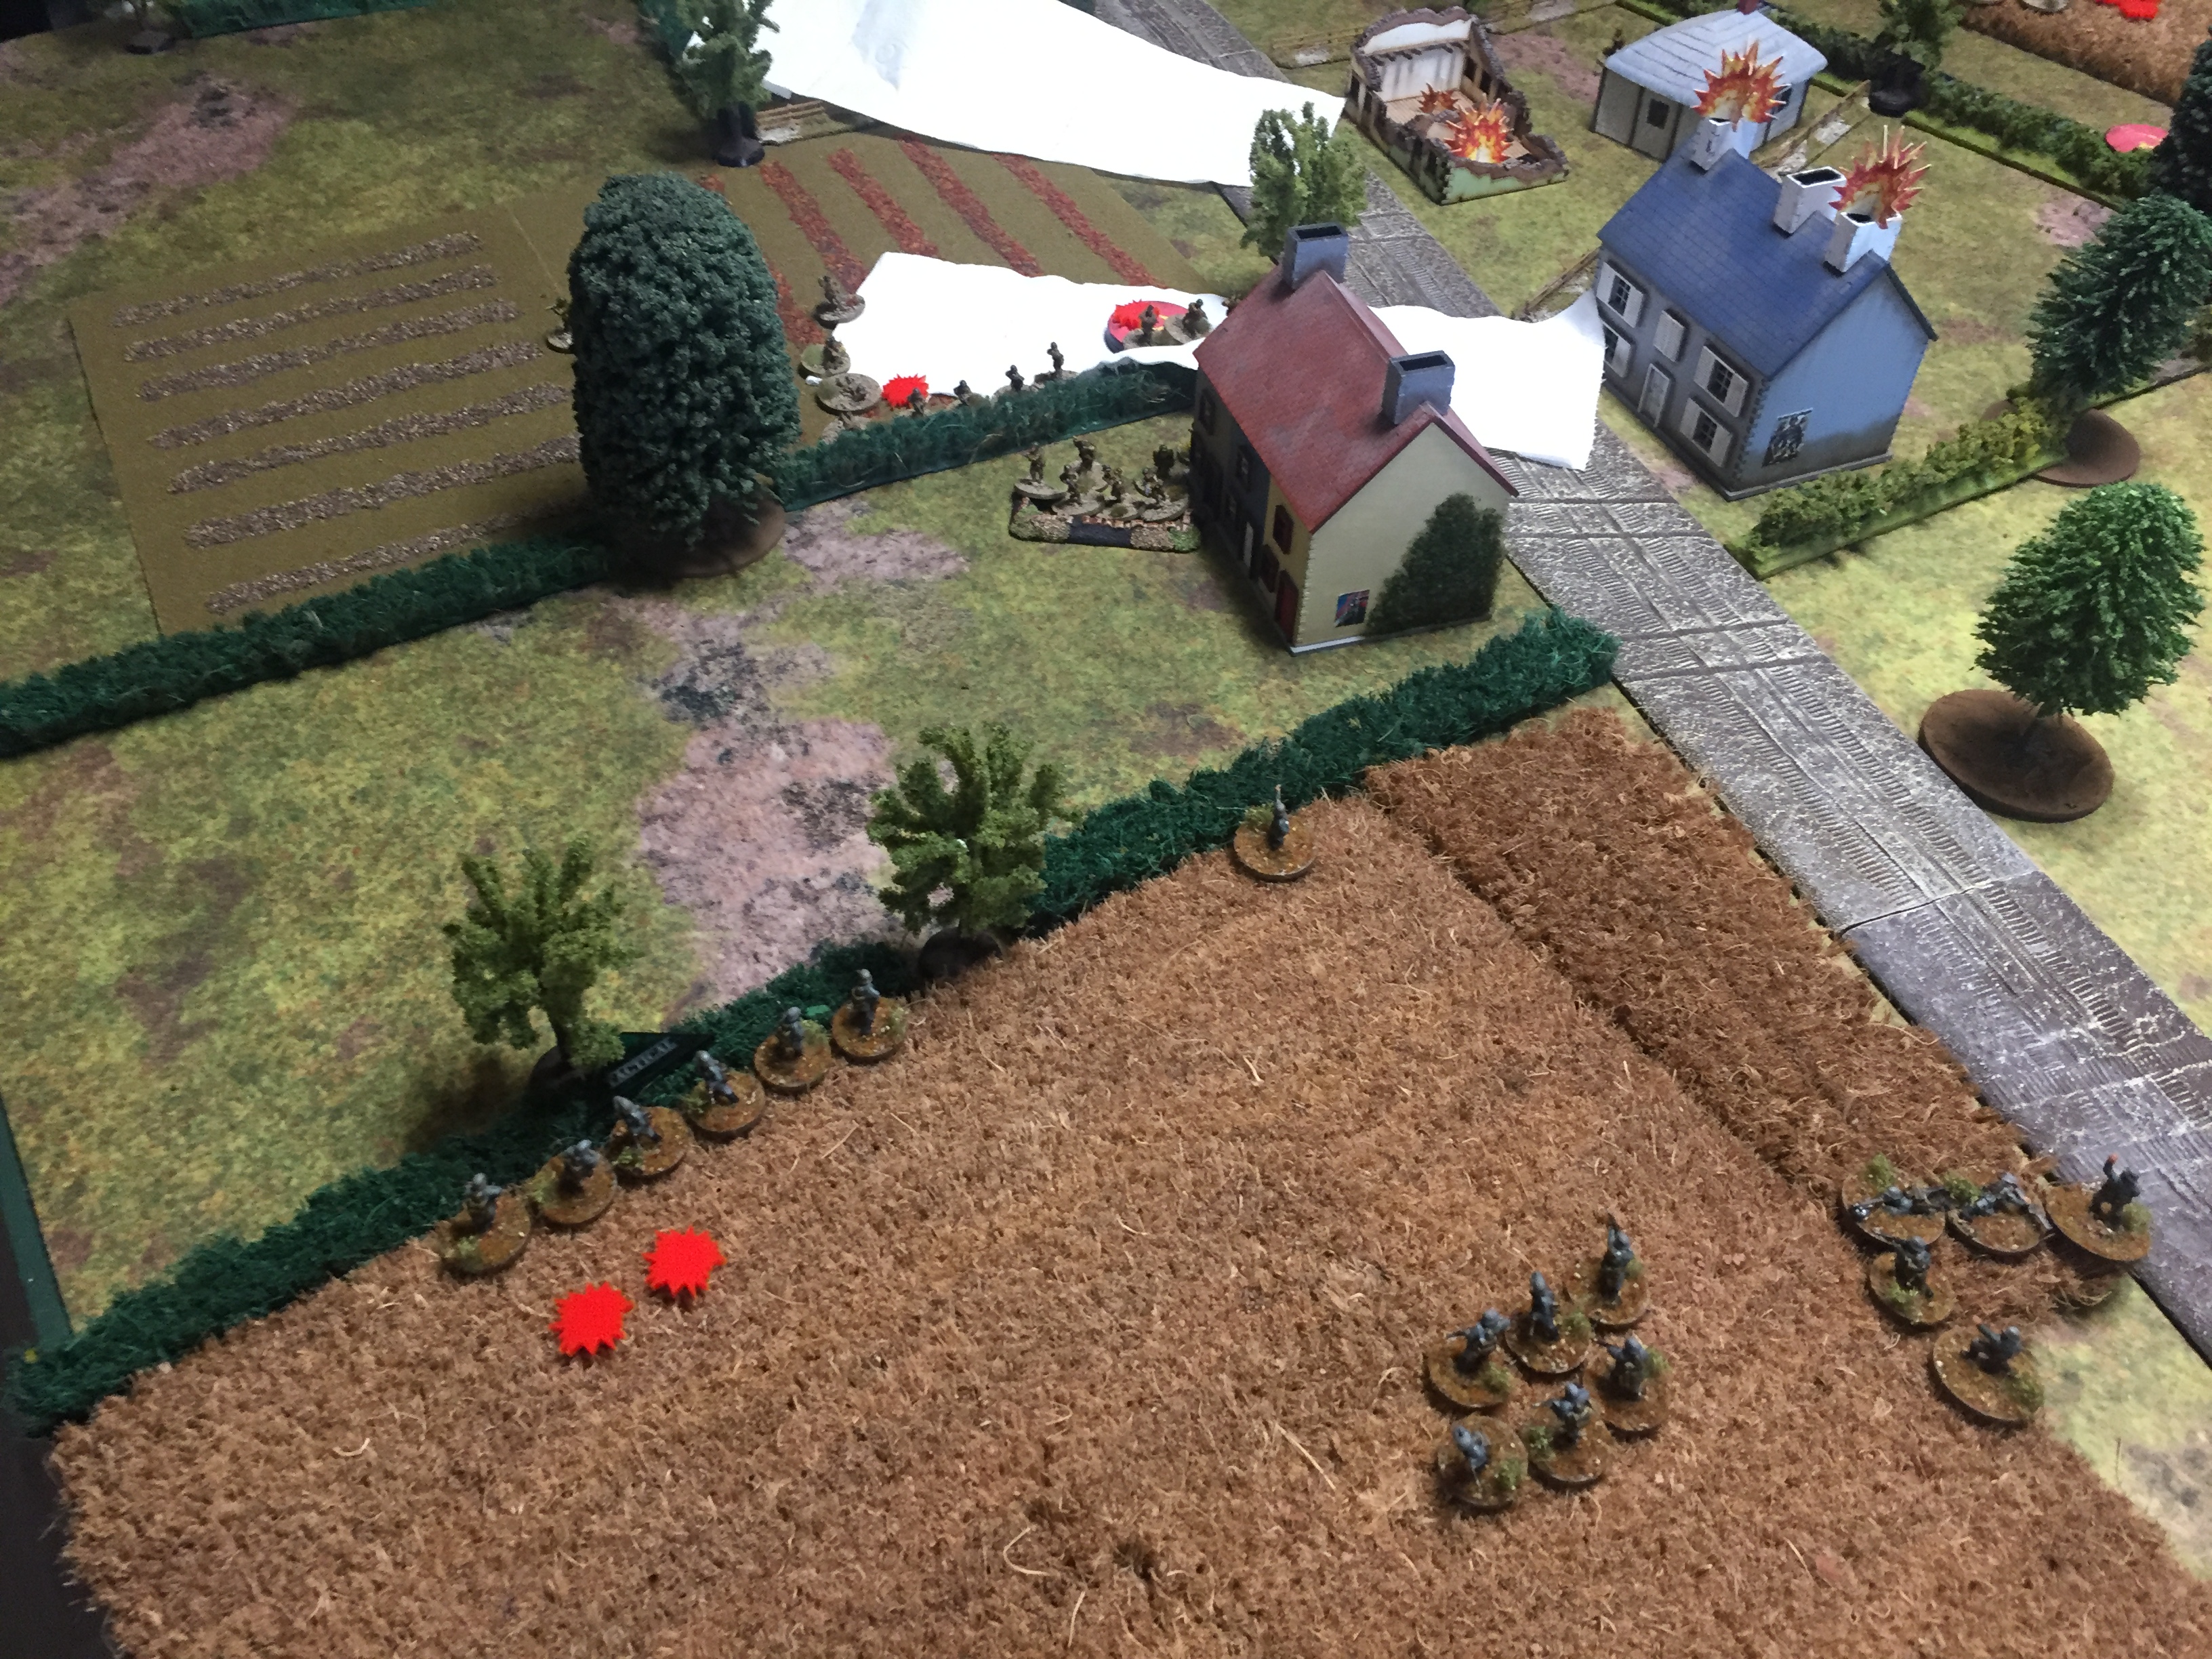
The Germans responded with a Pak 36 team and a 5cmm mortar team to try and put more fire into French forces.

A small French counter attack ended brutally as a rifle team was completely cut down as they tried to cross the open ground.

It was, however, too late as the German casualties mounted and one squad broke and retreated backwards. The last German squad tried to force their way through but as the German commander saw that the French prepared an even bigger counterattack he gave the order for a full retreat.

So the first battle ended with a defeat for the Germans, and they lost almost a third of their platoon. The French platoon took very few casualties and was quite ready to take on the next German attack.

Turn 2.

The Germans decided to attack again with the same platoon, despite the heavy casualties it had suffered in the first battle. Because it was the second battle in the same scenario the Germans would receive 2 more points of support and the French would lose one. On the other hand any Entrenchments from the first game would remain on the field.

Initially the Germans wanted their jump-off points to be roughly in the same positions as in the first game, as that would give the most flexibility in their attack. Unfortunately this didn't go quite as planned, as the Germans only managed to advance up their right flank, and was left completely on the base edge in the center and on the left flank. The French on the other hand managed to get their jump.off points placed evenly across the field.


This time the Germans had made 2 import changes in their support choices. They had picked a pre-game barrage, which happened to be a lot more effective in preventing the French from getting into their positions in good time. And they had brought along a 7.5cm infantry gun, which proved rather effective. Because of the position of their jump-off points the Germans saw no other way than just to go all in on their right flank.

The French called for armoured support but it was almost immediately forced off the field due to the fire from the Pak 36.

The French then tried to flank the Germans by advancing a squad down the German left flank. But by concentrating their forces and fire the Germans managed to break the French morale and they had to abandon the field.

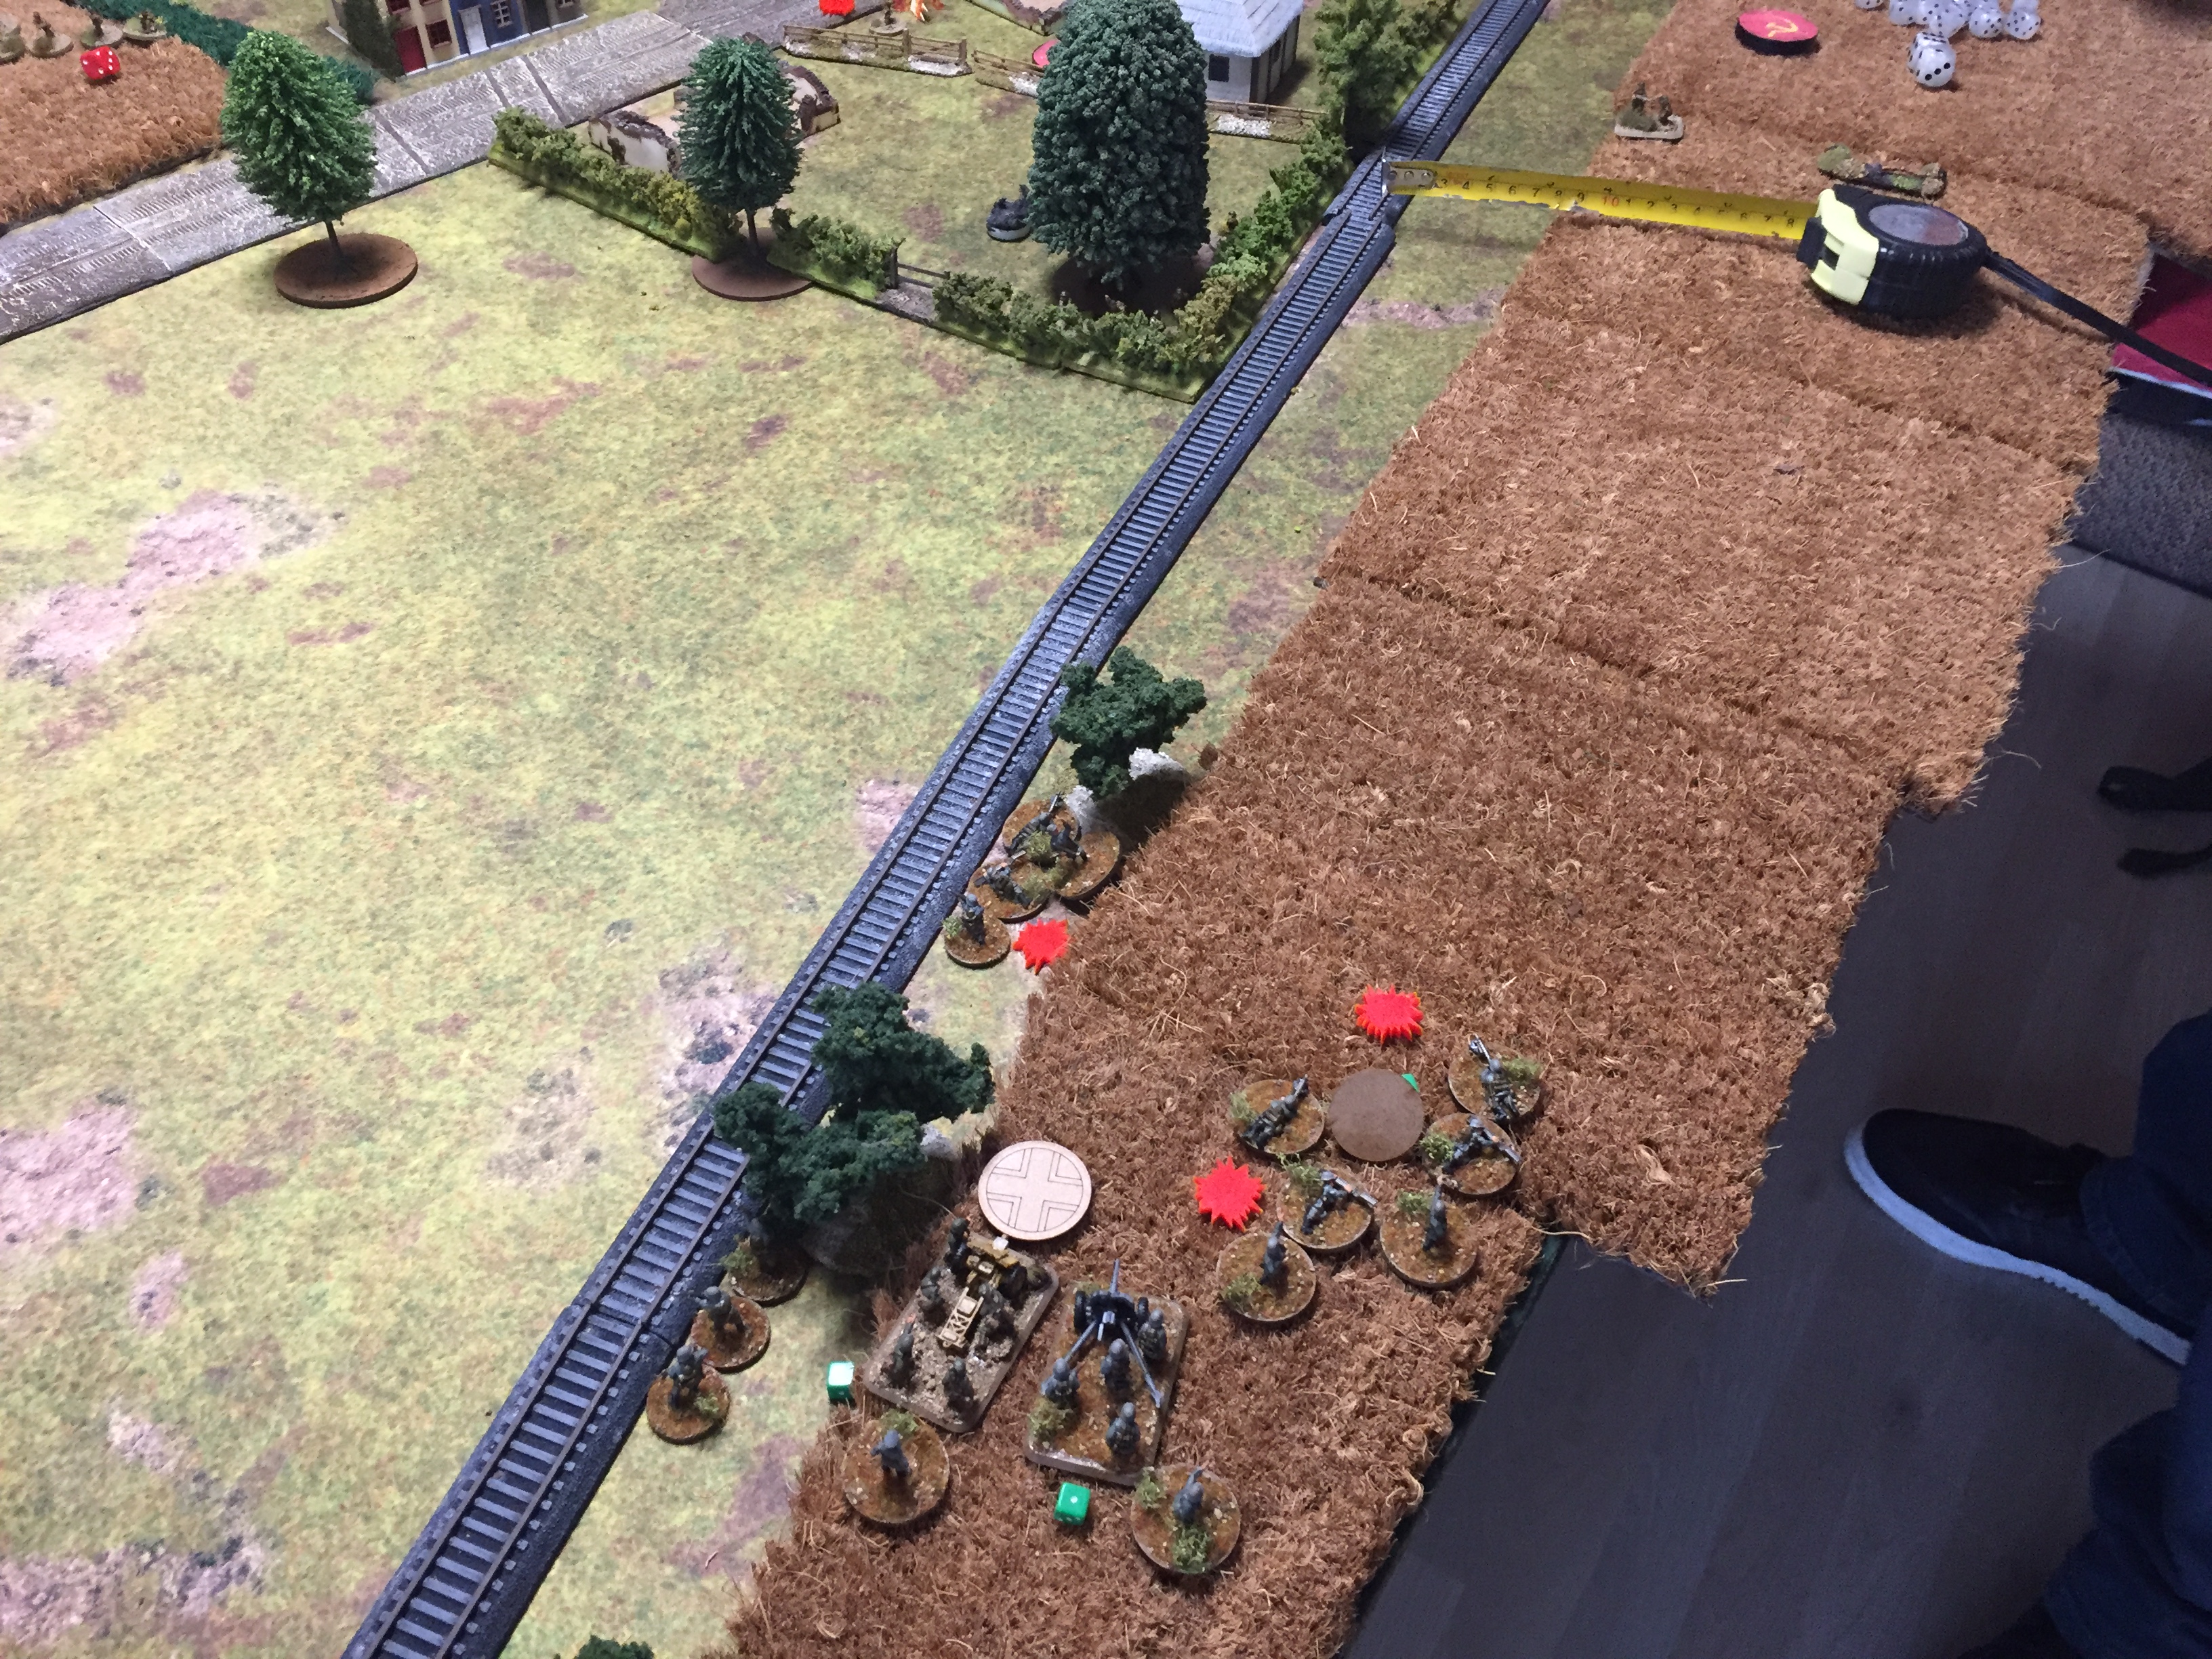
So despite their initial losses in the first game the German first managed to win the first scenario. And since their losses in the second game were very light, the platoon was still operational and would continue the attack in turn 3.

It was 2 very different battles, despite the apparent similarity. In the first game it seemed like I couldn't stop rolling 6's when being hit, and thus took a lot of casualties. And Steffen was lucky to get his troops on the field and in good positions, despite the Stuka Bombardment. Conversely in the second game the pre-game barrage worked better, and the Germans were able to overwhelm the French before they got into their positions.

But it was 2 fun, bloody and exciting games, which kicked off the campaign in excellent style.


Friday, 21 May 2021

Painted - 15mm WW2 early war Germans - Chain of Command

 Tomorrow I'll start the CoC pint-size campaign Taking the Gembloux Gap against my regular opponent Steffen. I'll be playing the Germans, and therefore had to paint up a German platoon.

As always I have used my simple style of painting by using a base spray, doing a few details and wash. This means that not all the miniatures has the right colour details, but from a distance I think they look just fine.

The platoon consists of 2 senior leaders, 3 squads with 10 men each and a mortar team. I also painted some support choices which includes 2 Pak 36, a sniper team, a demolition team and a forward observer.

I already have a good selection of armoured vehicles painted and ready for the campaign, so I am quite prepared to start the campaign. I will write up reports of our games as they happen.


Thursday, 6 May 2021

6mm American War of Independence armies

Some years ago a couple friends and I talked about doing the Seven Years war. I decided to the English and immediately ordered some figures from Baccus. They duly arrived and were subsequently put on the shelves and the project forgotten again.

A couple of years later I wanted to do some 2-armies projects for various periods that I could solo game. At this time I had become quite interested in the American War of Independence and so I decided to get an American army to face the English. Now, I quickly found that the English army looks slightly different between the 2 wars, but in 6mm I believe it's acceptable to ignore. 

I didn't want to paint the Americans so for the first time I decided to try and buy a painted army from Ebay. The result and price was okay, but unfortunately history repeated itself and once the painted Americans arrived, they were put on the shelves and the project abandoned. 

This year I wanted to finish the project, so I found someone on Facebook to paint the English, as I knew I wouldn't get them painted anytime soon myself. And this time they did not end up on the shelves. I got them based and bought flags and finally finished both armies.

The American army was bought as an army pack. I basically based them using the Black Powder unit types from the expansion book 'Rebellion!'. I have used various forms of bases and number of figures on the bases, so that I could do different types of units. The flags are also from Baccus, and I have used them randomly, so no particularly real-life formations.

For the English army I bought a bunch of line infantry, and some grenadiers, skirmish infantry, horse and artillery. As with the Americans I tried to base them, so I could field various forms of formations and unit types. And again the flags are added randomly, so not trying to do any specific real-life formations.


I am very pleased with armies and look forward to try them on the field. I will probably start out light with some smaller games with the One-Hour Wargames rules from Neil Thomas, and then try the full collection with Black Powder later on.

Tuesday, 4 May 2021

Dragon Rampant - Solo Game

For some time I have had an urge to do some fantasy gaming. I used to play a lot of Warhammer Fantasy Battle, but I stopped playing just before AoS came out. I sold off most of my miniatures and only kept a smaller Empire army, a handful of undead characters and a bunch of zombies.


Now it should be mentioned that I actually play Middle-Earth, which certainly is fantasy gaming, but for some reason I make a difference between Middle-Earth and other fantasy gaming. Probably because I feel that my LotR miniatures collection is tied very much to the game Middle-Earth, even though you could easily use other rule-sets to play with them.

Since my Warhammer days I have seen and discovered a lot of other fantasy manufacturers, but I still have a strong connection to the Warhammer universe, and I still think the GW miniatures are (mostly) great looking. So I will, at least initially, look to do some kind of Warhammer armies, but use other rules to game with, such as Dragon Rampant, Saga Age of Magic and Oathmark.

Since I have a small Empire army and a very small collection of undeads, one of which is a female vampire I have used in a Mordheim warband, I quickly thought of a narrative scenario which hopefully will be the starting point to a new and exciting world.


Elvira Le Borgne was a young noble woman from one of the smaller houses in the Caedoran kingdom. She was seduced by prince Cassius, the heir to the throne, and fell madly in love with him. When the prince eventually disavowed her in favour of a wealthier noble woman, Elvira was left disgraced and dishonoured. 

She fled to the eastern island sea to plot for her revenge. Here she met Lord Acheron, a powerful and ancient vampire, who was more than eager to enlist Elvira in his ranks and aid Elvira with her vengeance. Once her powers had grown Acheron gave her 3 companions, and she went on her quest for retribution.

The scenario is Elvira and her companions first attack on a small Caedorian outpost close to the coast. I use the Dragon Rampant rules in a self-made scenario. The rules is a sort of sandbox where you can make your own units from a set of preset unit templates. I will not go into detail how the various units work, apart from 'The Companions' unit which is one where I have tinkered more with the rules to make a unit that worked for me.

Armies
The Undead Army:
Elvira - Elite Foot - 9 pts.
Special rules: Ranger, Hatred(humans), Fear, Undead
 
The Companions - Heavy Foot - 9 pts. (approx.)
This unit is comprised of 3 different characters; a Ghoul Lord, a Spectre and a Necromancer. The characters must be within 12" of one another. They can be ordered either individually, or as a group of 2 or 3 in which case they have to be within 6" of each other. The Ghoul Lord and the Spectre have 6 attack dice each and the Necromancer has none. The 3 characters have 4 defence dice each. If the they are within 6" of each other they will use their combined attack/defence dice. Each character have 4 strength points. If more character than one character is involved in a fight or the target of a shooting attach, they will divide any hits equally starting with the closest character to the enemy.
Special rules: Undead (Ghoul Lord and Spectre), Fear (Ghoul Lord and Spectre), Venomous (Ghoul Lord), Invisibility (Spectre), Summoner (Necromancer)

Zombie Horde - Ravenous Horde - 3 pts.
The Necromancer can summon zombie hordes using the Summoner rules. Only 2 Zombie units can be on the table at any one time.
Special rules: Undead, Fear 

The Caedorian Army:
Captain - Light Foot - 3 pts.

Wizard - Light Foot - 5 pts.
Special rules: Wizardling (spells: Almighty Prod, Stronger Shields, Sharper Blades)

Halberdiers - Heavy Foot - 4 pts.
Special rules: Wall of Spears

Swordsmen - Heavy Foot - 4 pts.
Special rules: Wall of Spears

Crossbowmen - Heavy Missiles - 4 pts.

Scouts - Scouts - 2 pts.

Deployment 
The outpost is in the center of the board with some woods to the west and a ruined monastery to the east. The Companions start in the woods, while Elvira starts behind the monastery.

The Captain and Wizard start in the tower. The Swordsmen are in one guard post and the Crossbowmen in the other. The Scouts are posted at the wall towards the woods, while the Halberdiers stand in front of the tower. The Caedorian soldiers have to spot Elvira and THe Companions before they can attack them. This is an action on 8+ if within 12" and 9+ if over. If one Caedorian unit spots either Elvira or the Companions then all other Caedorian units can see them as well. Conversely if Elvira or The Companions attacks the Caedorians then they are spotted by all.

Elvira sneaks through the ruined monastery while the Companions approach the outpost from the opposite side.

It takes 6 turns before the Caedorians spot the Companions. The Captain immediately descends the tower, but the rest of the humans seem petrified in fear and fail to activate.

Meanwhile Elvira gets closer to the Crossbowmen, who fail to spot the vampire, probably distracted by the shouts from the other end of the outpost.

After having been spotted the Necromancer summons a horde of zombies.

From the top of the tower the Wizard tries to aid the Caedorians, but apparently he's a novice, as he often fails to cast any spells. Or maybe the Spectre in the woods somehow messes up his spellcasting.

The Swordsmen move to defend the walls against the zombies. The zombies are easily pushed back but at least keep the Swordsmen in place.

On the other side Elvira finally ambushes the Crossbowmen. Apparently they are so shocked by this attack they immediately runs away.

The Ghoul Lord has crawled over the walls and attacks the Swordsmen who almost flee, but stand their ground thanks to the Captains nearby encouragement.

After slaughtering the Crossbowmen Elvira moves to attack the Halberdiers, while the Companions press the attack on the Swordsmen.

Elvira attacks and push the Halberdiers back up the tower.

The Swordsmen manage to kill off the zombies across the wall, but more zombies appear from the monastery. The Captain bravely attacks the Companions but is pushed back battered.

Elvira kills the Halberdiers, while The Companions move towards the Scouts. The Swordsmen and zombies kill each other by the monastery.

The poor wizard is trapped in the tower and is effortlessly killed by Elvira and thrown out off the tower. The Scouts were also killed easily by The Companions, leaving only the Captain alive, who wisely decide to run for it. Elvira first attack was a great success. The outpost will be burned down, and Elvira will assemble more troops to continue her attack on the Caedoran kingdom.

This was a great, narrative game that went really well. I did make some rules errors throughout the game, but as it was a solo game it didn't really matter. And it was my first game of Dragon Rampant, and several years ago I last tried Lion Rampant. My rules for the Companions worked really well and was a fun narrative addition. 
I also liked the look of the game. The cardboard terrain was new and from a company called Battle Systems. I really like the buildings and the scatter terrain, but am a little unsure about the walls as they lack some depth to look entirely natural. But in general I think it works very well.
In general the game was probably in the Undeads favour, but as this was a narrative game, that was perfectly fine for me. It should be noted, however, that the Caedorians rolled rather poorly throughout the game, so it could have been more close. And the Ghoul King was one strength point away from dying, and the Spectre two, so they could have died as well. Elvira was a beast, but I thoroughly enjoyed that.
I have already ordered some more reinforcements for Elvira's army, but I need to paint them before I can play again (and the zombies as well, sorry about that). I'm thinking about playing some games of SAGA Age of Magic and Oathmark as well, but I don't think I have enough Undead troops to that properly. 
So we'll have to see what the future brings. I really want to continue this narrative, so I'll be thinking about of ideas to how that story shall continue.

The Battle of The Grave Barrens - Dragon Rampant solo game

  After Elvira's first victory in what was later known as the Battle of Lost Souls, named after the nearby ruins of the Monastery of Los...